
Framer 中使用真实数据:天气
2022年11月1日
在第二篇中,我们将使用真实的 API 数据制作天气小组件。我们将从 OpenWeather 获取 API,然后利用 Framer 的 NPM import 特性,在 Override 中导入 “openweather-api-node” 来使用 API。
创建 UI
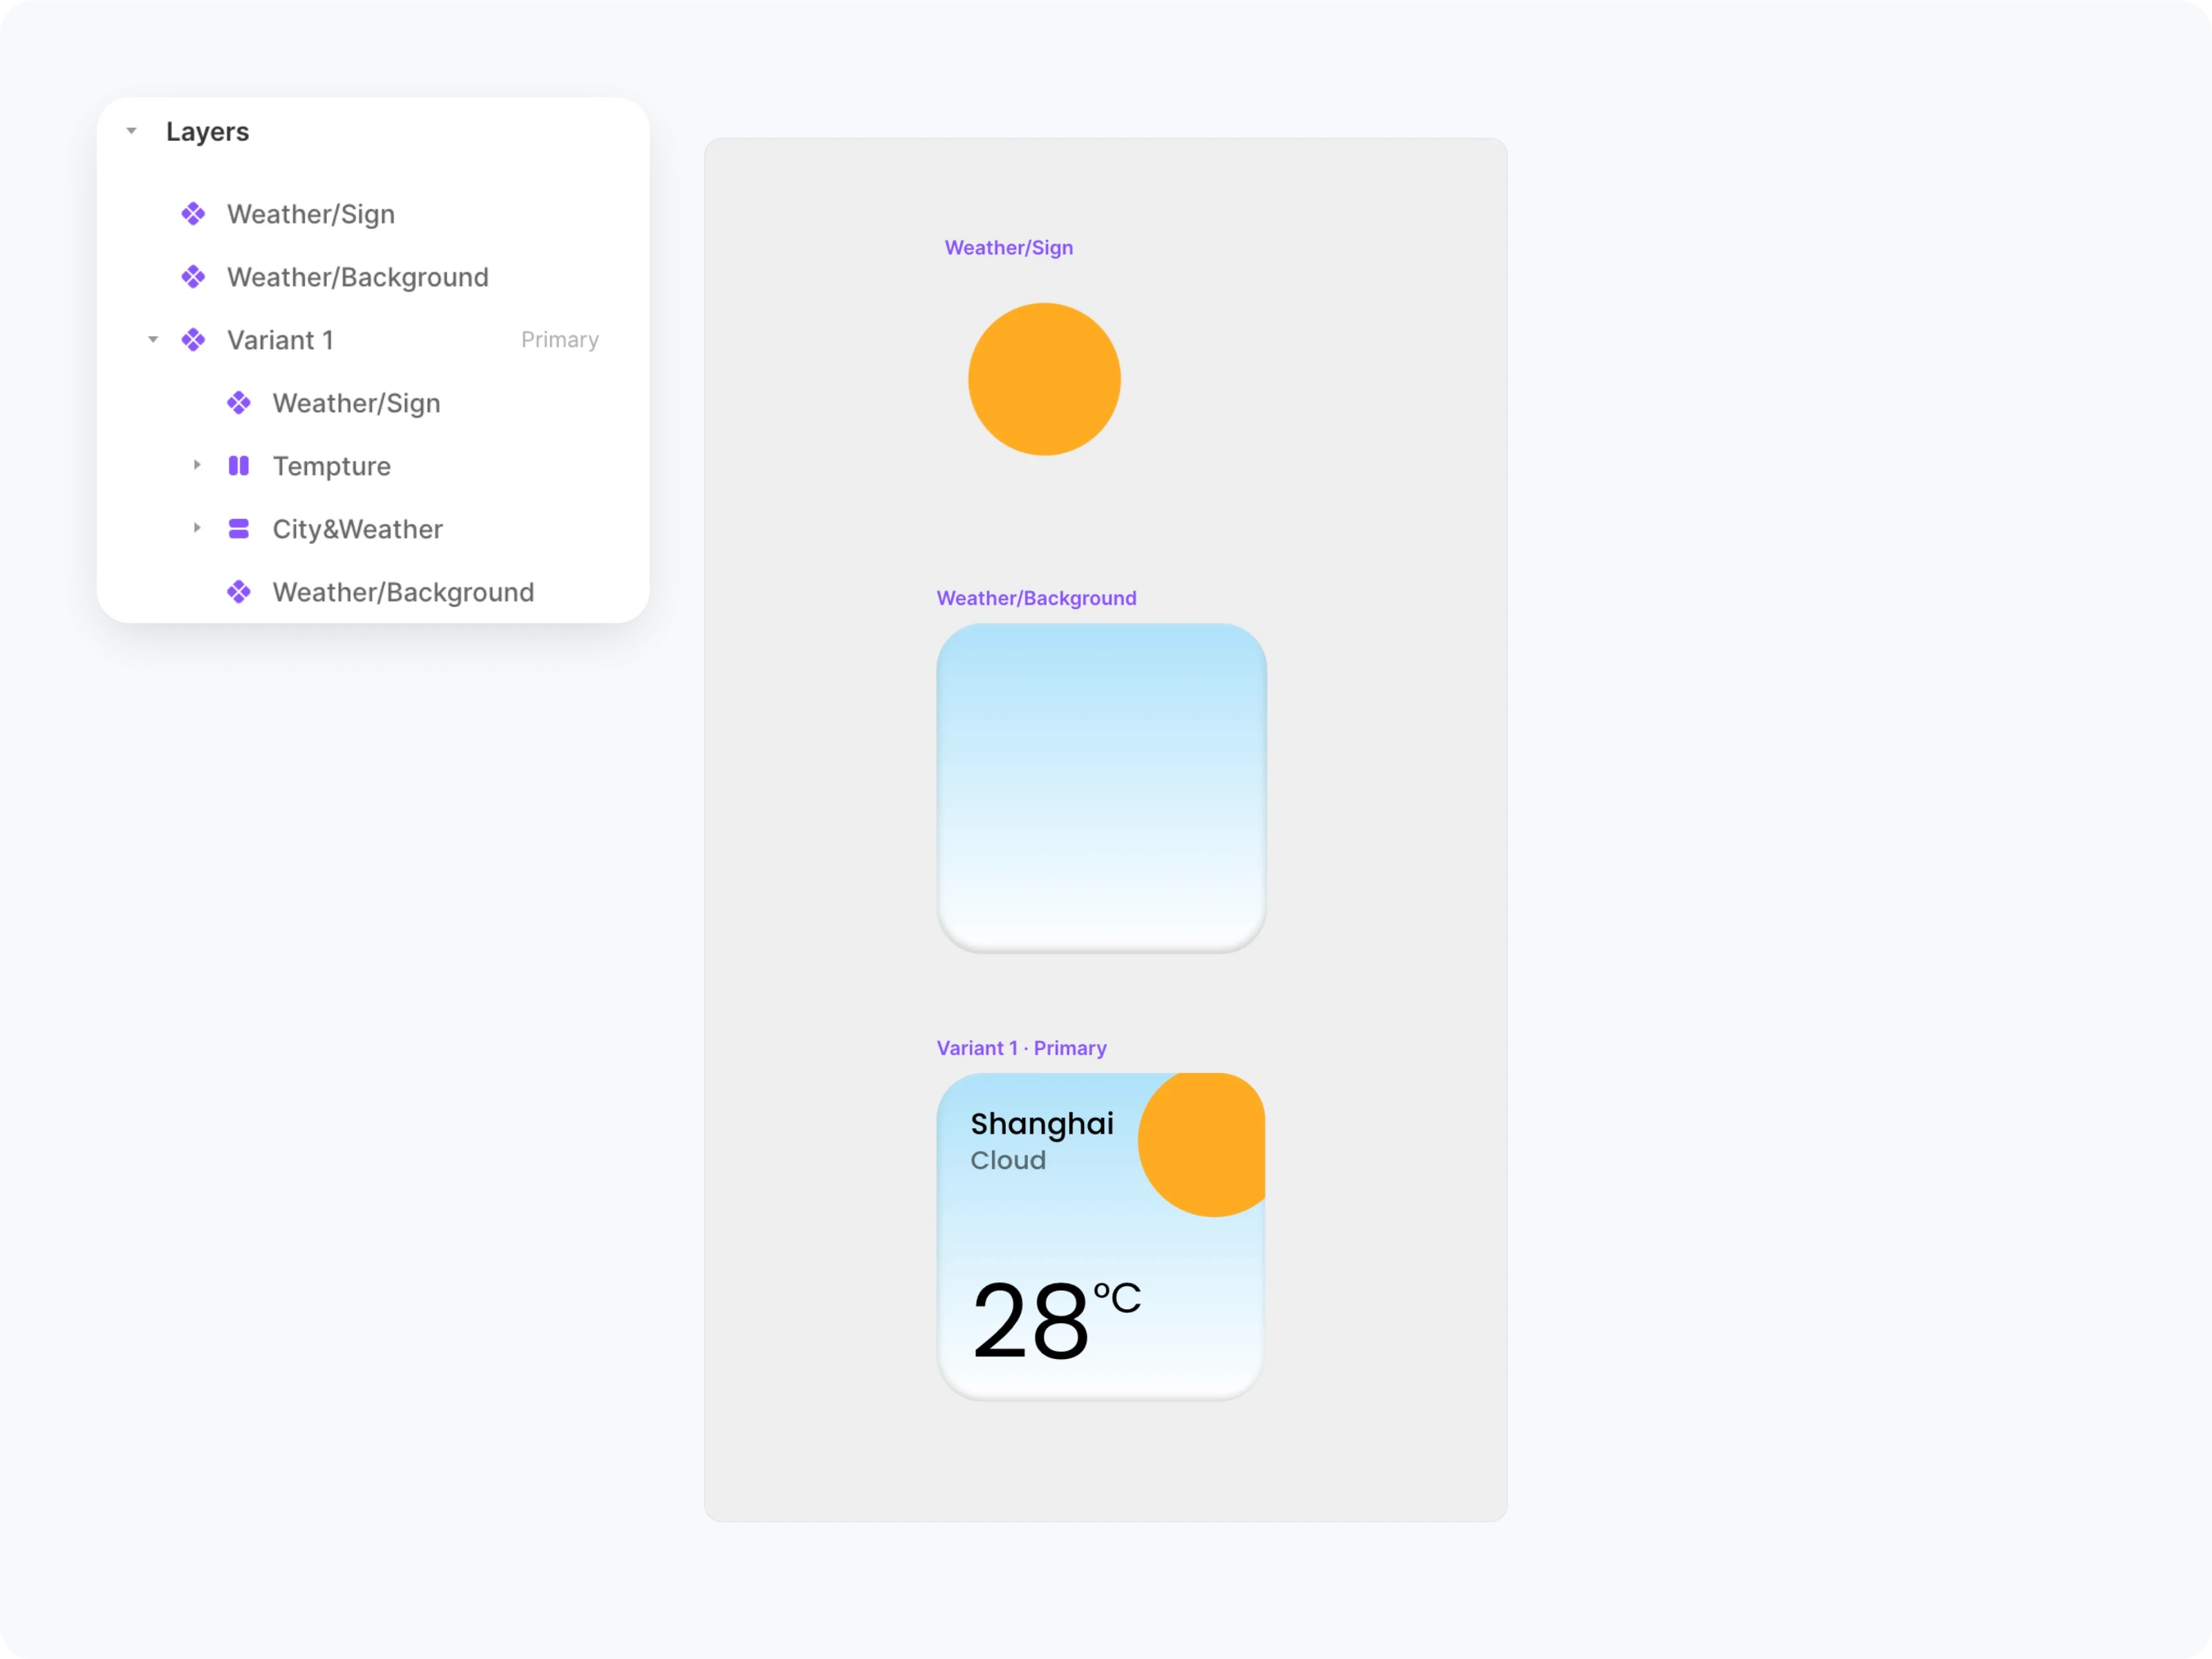
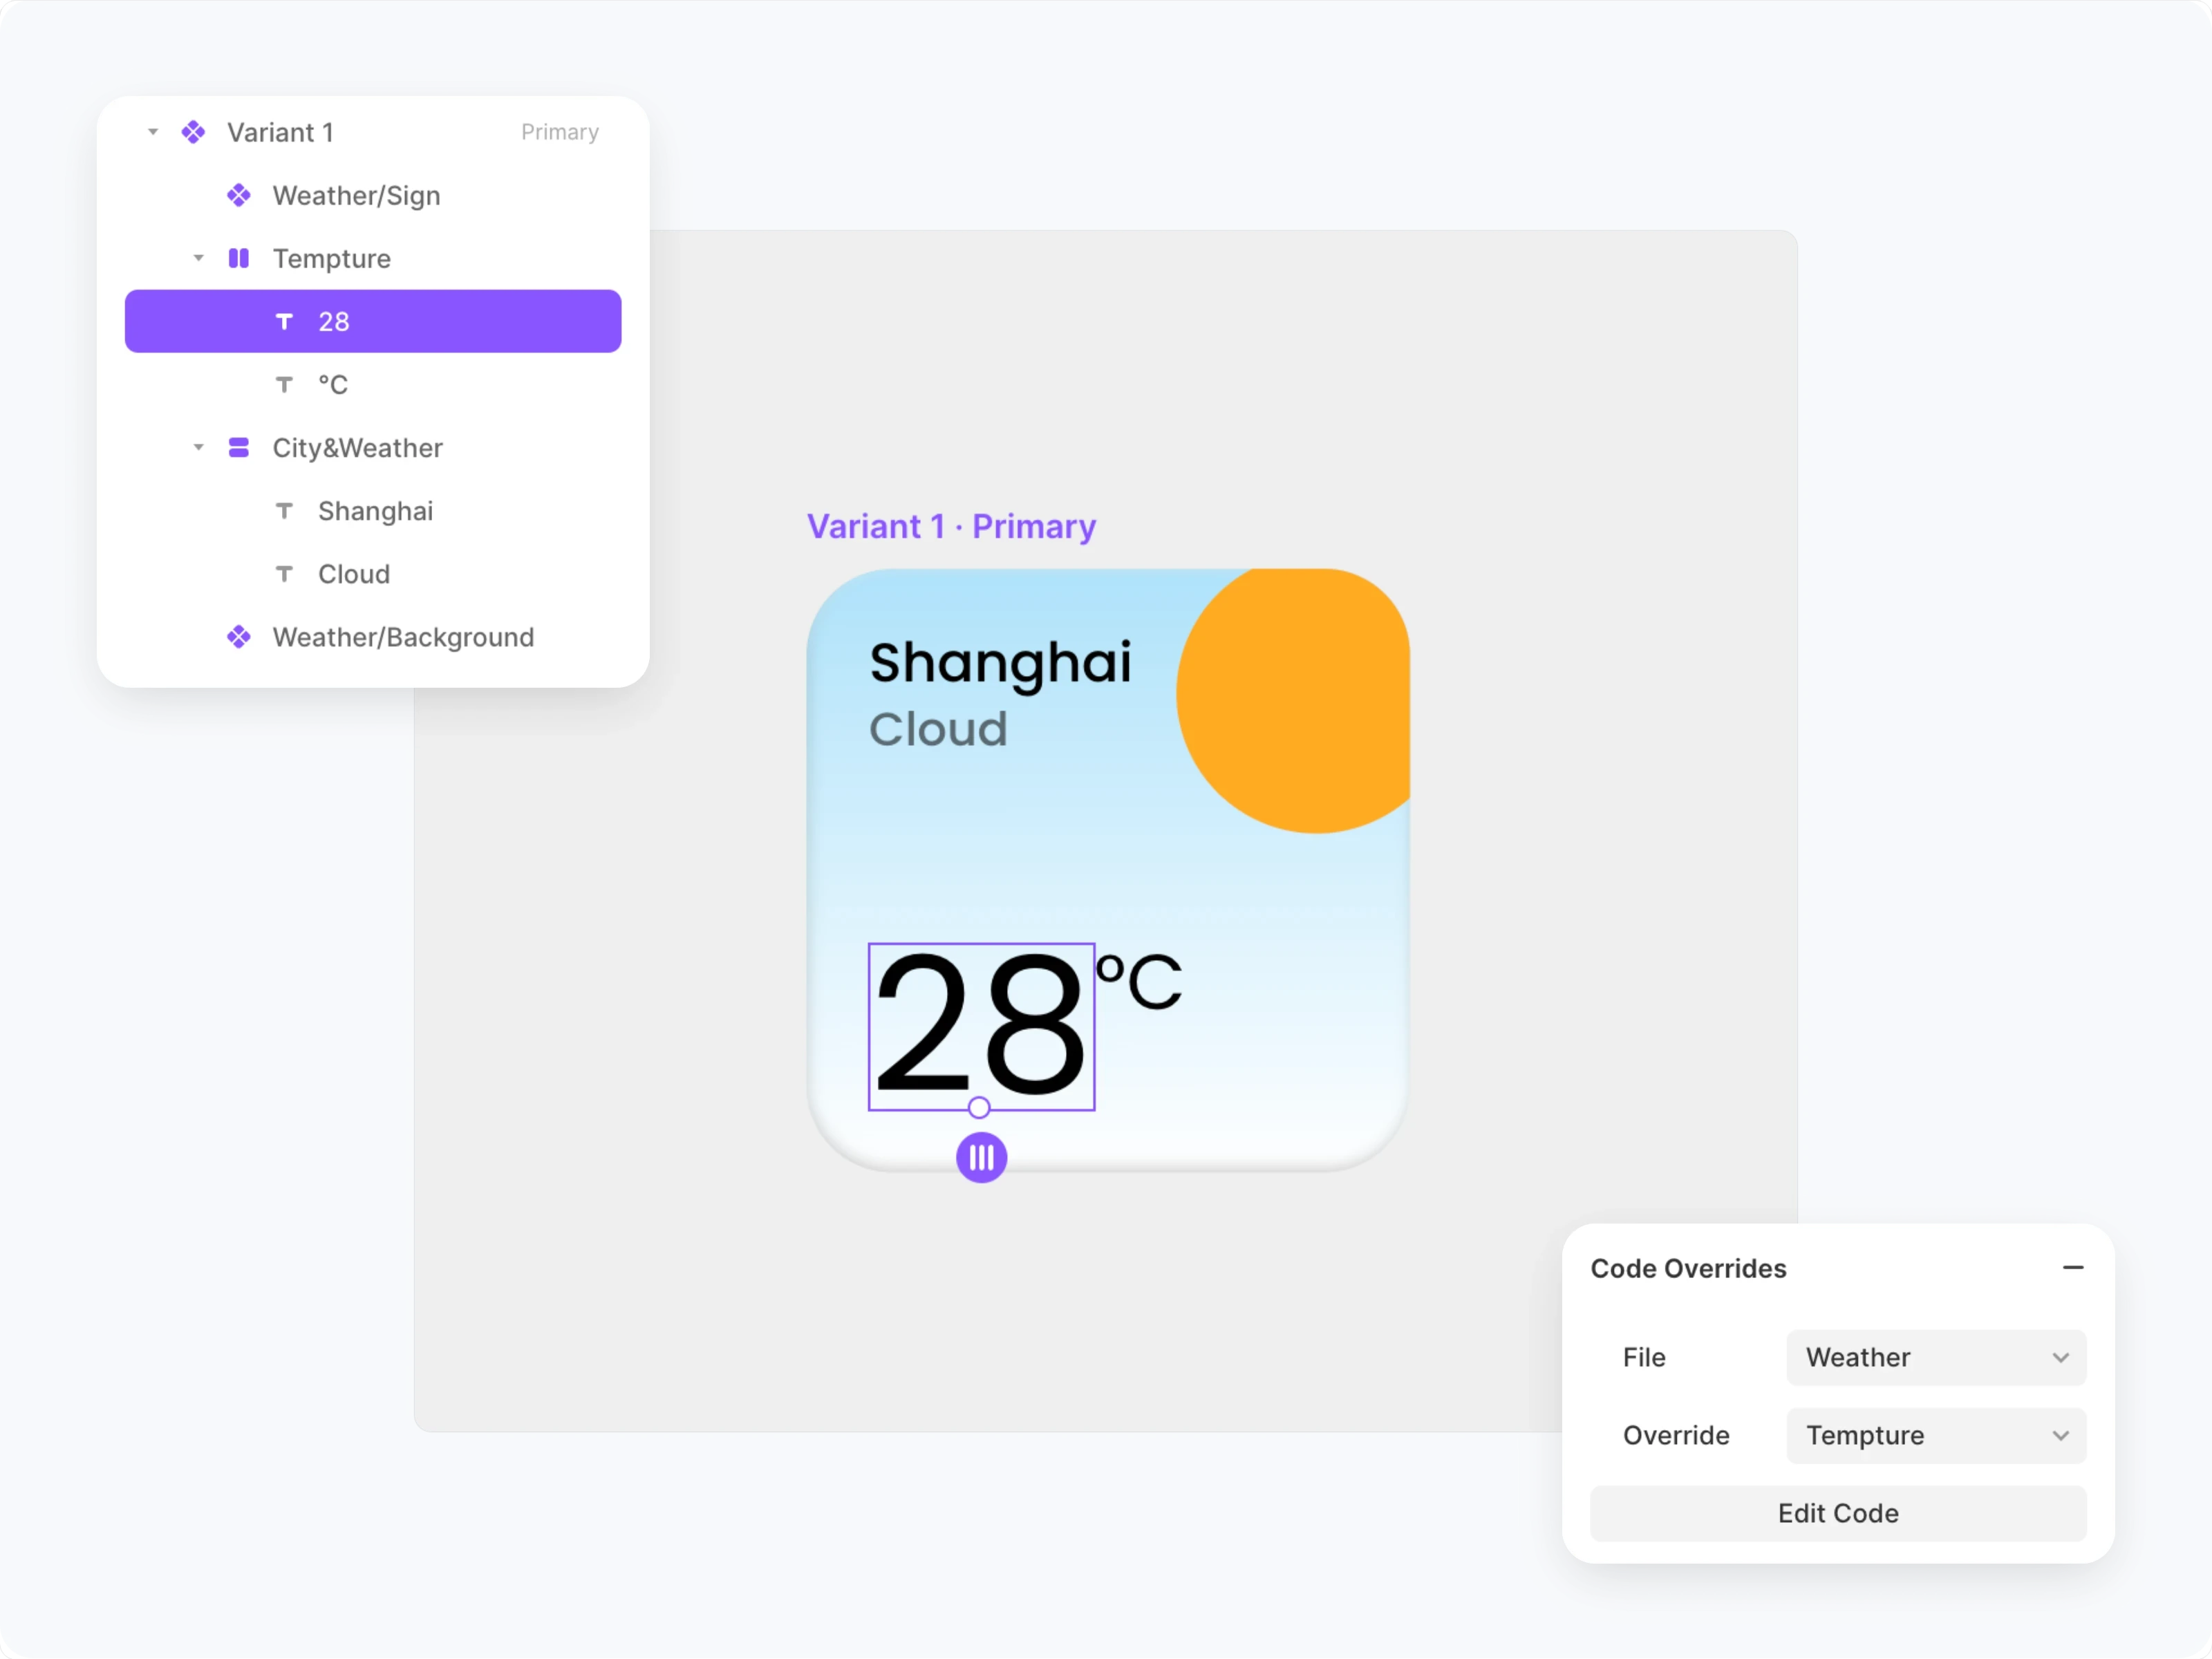
首先,我们需要创建一个天气组件的UI,它包含城市、天气、天气标志、温度与背景。其中,我们将天气标志与背景单独建立为新的组件,这样可以方便我们修改小组件的样式。
天气标志与背景图层
将天气标志与背景分别建立为组件,并将 **Variant** 命名为对应的天气(这些天气名称与API提供的名称相同)。
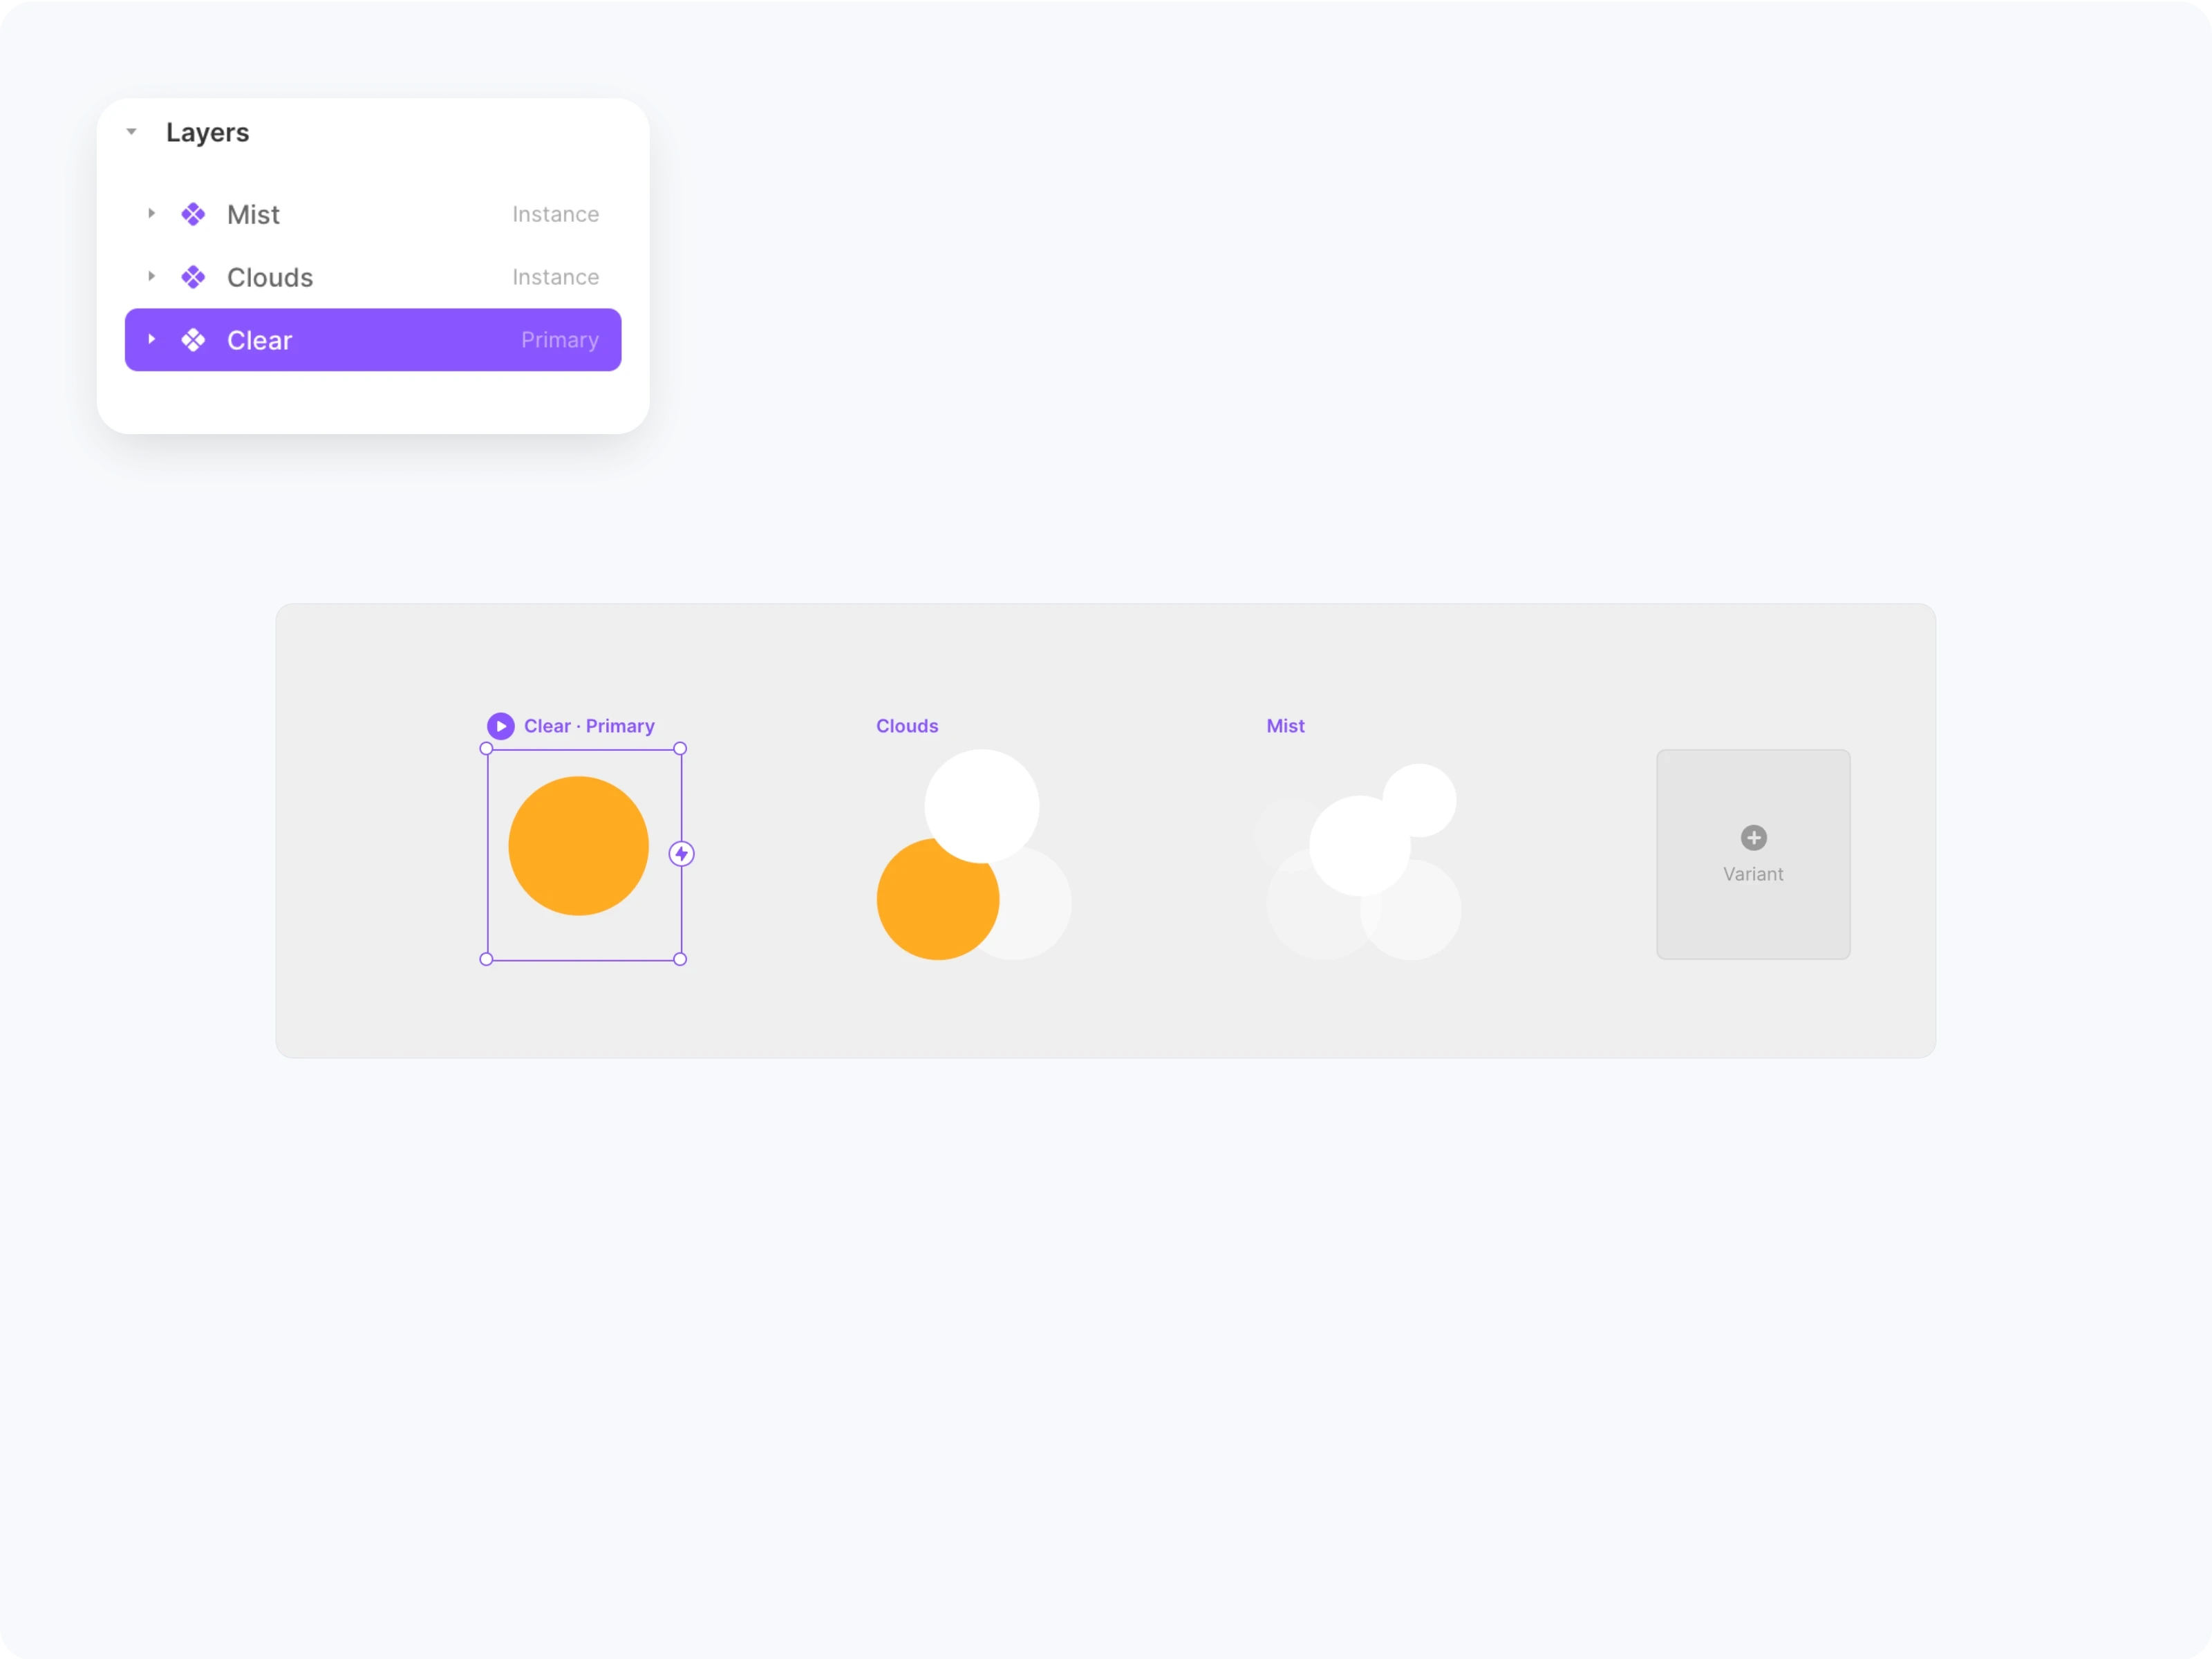
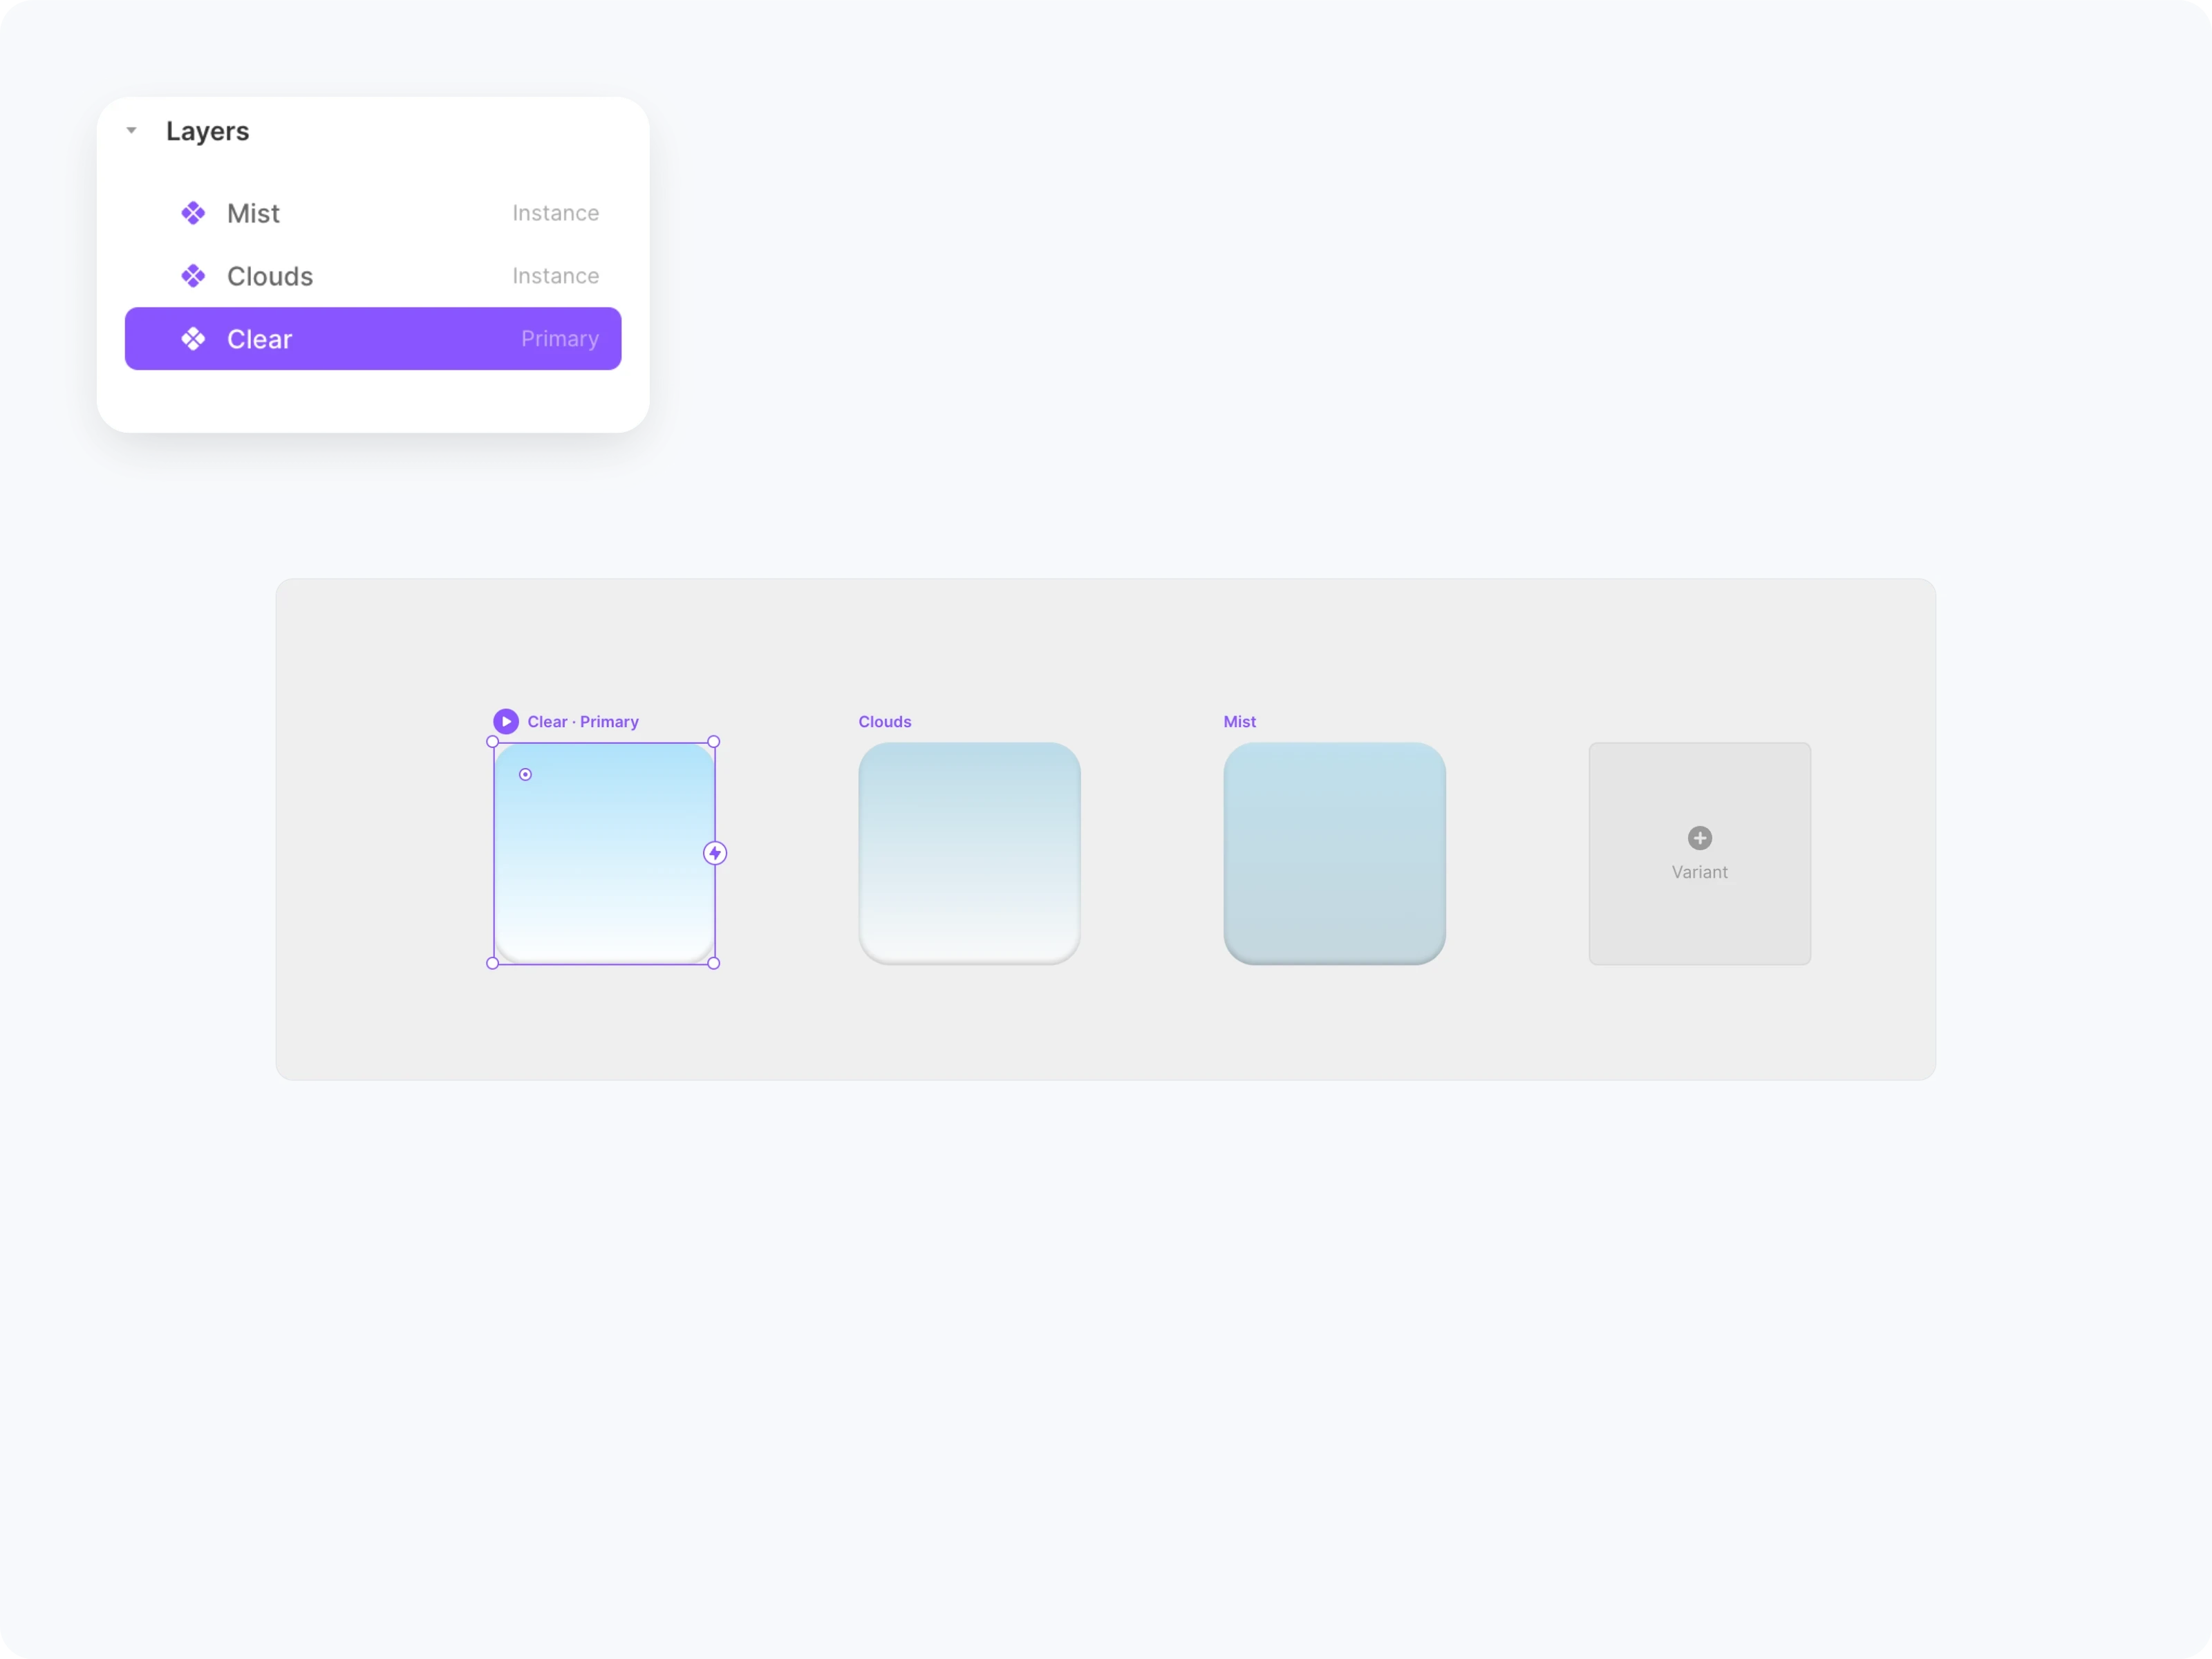
这里我以三个天气作为示例,你可以直接复制这个组件到 Framer 中来跳过设计 UI 的过程。
Override
新建一个 Override 文件,并导入 React 与 OpenWeatherAPI。在[openweather-api-node]的 NPM 页面中,我们可以找到包的使用方式。
import * as React from "react"
import OpenWeatherAPI from "openweather-api-node"
import type { ComponentType } from "react"
export function Temperature(Component): ComponentType {
    return (props) => {
        const weather = new OpenWeatherAPI()
        const [data, setData] = React.useState({ weather: "", tempture: 0 })
        return <Component {...props} />
    }
}
由于我们使用了OpenWeather API,我们需要获得一个 Key 来让 OpenWeather 允许我们访问数据。在这之前,我们先将 Override 配置完整,然后再到 OpenWeather 申请 Key。
获取当前温度
我们可以通过 “weather.getCurrent()” 来获取当前的天气数据,其中 “weather.temp.cur” 会提供当前的温度数据。
 React.useEffect(() => {
            weather.setKey("Your Key Here")
            weather.setLanguage("en")
            weather.setUnits("metric")
            weather.setLocationByName("Shanghai")
            weather.getCurrent().then((data) => {
                setData(data.weather.temp.cur)
            })
        }, [])
我们将温度数据直接显示到文图层中即可。API 的温度数据比较精确(它精确到了小数点后几位),因此我们可以利用 “toFixed(0)” 来只显示整数。
export function Temperature(Component): ComponentType {
    return (props) => {
        const weather = new OpenWeatherAPI()
        const [data, setData] = React.useState(0)
        React.useEffect(() => {
            weather.setKey("Your Key Here")
            weather.setLanguage("en")
            weather.setUnits("metric")
            weather.setLocationByName("Shanghai")
            weather.getCurrent().then((data) => {
                setData(data.weather.temp.cur)
            })
        }, [])
        return <Component {...props} text={data.toFixed(0)} />
    }
}
获取当前天气
同样地,“weather.main” 提供当前天气的名称,例如晴朗、多云、雾、雨等。我们利用这个数据显示当前的天气并控制 Variant。
export function Weather(Component): ComponentType {
    return (props) => {
        const weather = new OpenWeatherAPI()
        const [data, setData] = React.useState("Loading")
        React.useEffect(() => {
            weather.setKey("Your Key Here")
            weather.setLanguage("en")
            weather.setUnits("metric")
            weather.setLocationByName("Shanghai")
            weather.getCurrent().then((data) => {
                setData(data.weather.main)
            })
        }, [])
        return <Component {...props} text={data} variant={data} />
    }
}
API Key
首先,我们需要注册一个[OpenWeather] 账户,然后前往[OpenWeather/My API keys] 即可看到 API Key。如果你没有看到 Key,可以在右侧生成新的 Key。
直接将 Key 粘贴到 “weather.setKey("Your Key Here”)” 中即可。
        React.useEffect(() => {
            weather.setKey("b679............")
            weather.setLanguage("en")
            weather.setUnits("metric")
            weather.setLocationByName("Shanghai")
            weather.getCurrent().then((data) => {
                setData(data.weather.main)
            })
        }, [])
最后,将 Override 与图层了连接即可。我们将 Override/Temperature 连接到温度文本,将 Override/Weather 连接到天气文本、标志以及背景。
预览组件,你可以看到所有的数据都开始变化,一个真实的天气小组件就完成了。
完整代码
import * as React from "react"
import OpenWeatherAPI from "openweather-api-node"
import type { ComponentType } from "react"
export function Temperature(Component): ComponentType {
    return (props) => {
        const weather = new OpenWeatherAPI()
        const [data, setData] = React.useState(0)
        React.useEffect(() => {
            weather.setKey("Your Key Here")
            weather.setLanguage("en")
            weather.setUnits("metric")
            weather.setLocationByName("Shanghai")
            weather.getCurrent().then((data) => {
                setData(data.weather.temp.cur)
            })
        }, [])
        return <Component {...props} text={data.toFixed(0)} />
    }
}
export function Weather(Component): ComponentType {
    return (props) => {
        const weather = new OpenWeatherAPI()
        const [data, setData] = React.useState("Loading")
        React.useEffect(() => {
            weather.setKey("Your Key Here")
            weather.setLanguage("en")
            weather.setUnits("metric")
            weather.setLocationByName("Shanghai")
            weather.getCurrent().then((data) => {
                setData(data.weather.main)
            })
        }, [])
        return <Component {...props} text={data} variant={data} />
    }
}
Content
Framer 中使用真实数据:天气
2022年11月1日
在第二篇中,我们将使用真实的 API 数据制作天气小组件。我们将从 OpenWeather 获取 API,然后利用 Framer 的 NPM import 特性,在 Override 中导入 “openweather-api-node” 来使用 API。
创建 UI
首先,我们需要创建一个天气组件的UI,它包含城市、天气、天气标志、温度与背景。其中,我们将天气标志与背景单独建立为新的组件,这样可以方便我们修改小组件的样式。
天气标志与背景图层
将天气标志与背景分别建立为组件,并将 **Variant** 命名为对应的天气(这些天气名称与API提供的名称相同)。
这里我以三个天气作为示例,你可以直接复制这个组件到 Framer 中来跳过设计 UI 的过程。
Override
新建一个 Override 文件,并导入 React 与 OpenWeatherAPI。在[openweather-api-node]的 NPM 页面中,我们可以找到包的使用方式。
import * as React from "react"
import OpenWeatherAPI from "openweather-api-node"
import type { ComponentType } from "react"
export function Temperature(Component): ComponentType {
    return (props) => {
        const weather = new OpenWeatherAPI()
        const [data, setData] = React.useState({ weather: "", tempture: 0 })
        return <Component {...props} />
    }
}
由于我们使用了OpenWeather API,我们需要获得一个 Key 来让 OpenWeather 允许我们访问数据。在这之前,我们先将 Override 配置完整,然后再到 OpenWeather 申请 Key。
获取当前温度
我们可以通过 “weather.getCurrent()” 来获取当前的天气数据,其中 “weather.temp.cur” 会提供当前的温度数据。
 React.useEffect(() => {
            weather.setKey("Your Key Here")
            weather.setLanguage("en")
            weather.setUnits("metric")
            weather.setLocationByName("Shanghai")
            weather.getCurrent().then((data) => {
                setData(data.weather.temp.cur)
            })
        }, [])
我们将温度数据直接显示到文图层中即可。API 的温度数据比较精确(它精确到了小数点后几位),因此我们可以利用 “toFixed(0)” 来只显示整数。
export function Temperature(Component): ComponentType {
    return (props) => {
        const weather = new OpenWeatherAPI()
        const [data, setData] = React.useState(0)
        React.useEffect(() => {
            weather.setKey("Your Key Here")
            weather.setLanguage("en")
            weather.setUnits("metric")
            weather.setLocationByName("Shanghai")
            weather.getCurrent().then((data) => {
                setData(data.weather.temp.cur)
            })
        }, [])
        return <Component {...props} text={data.toFixed(0)} />
    }
}
获取当前天气
同样地,“weather.main” 提供当前天气的名称,例如晴朗、多云、雾、雨等。我们利用这个数据显示当前的天气并控制 Variant。
export function Weather(Component): ComponentType {
    return (props) => {
        const weather = new OpenWeatherAPI()
        const [data, setData] = React.useState("Loading")
        React.useEffect(() => {
            weather.setKey("Your Key Here")
            weather.setLanguage("en")
            weather.setUnits("metric")
            weather.setLocationByName("Shanghai")
            weather.getCurrent().then((data) => {
                setData(data.weather.main)
            })
        }, [])
        return <Component {...props} text={data} variant={data} />
    }
}
API Key
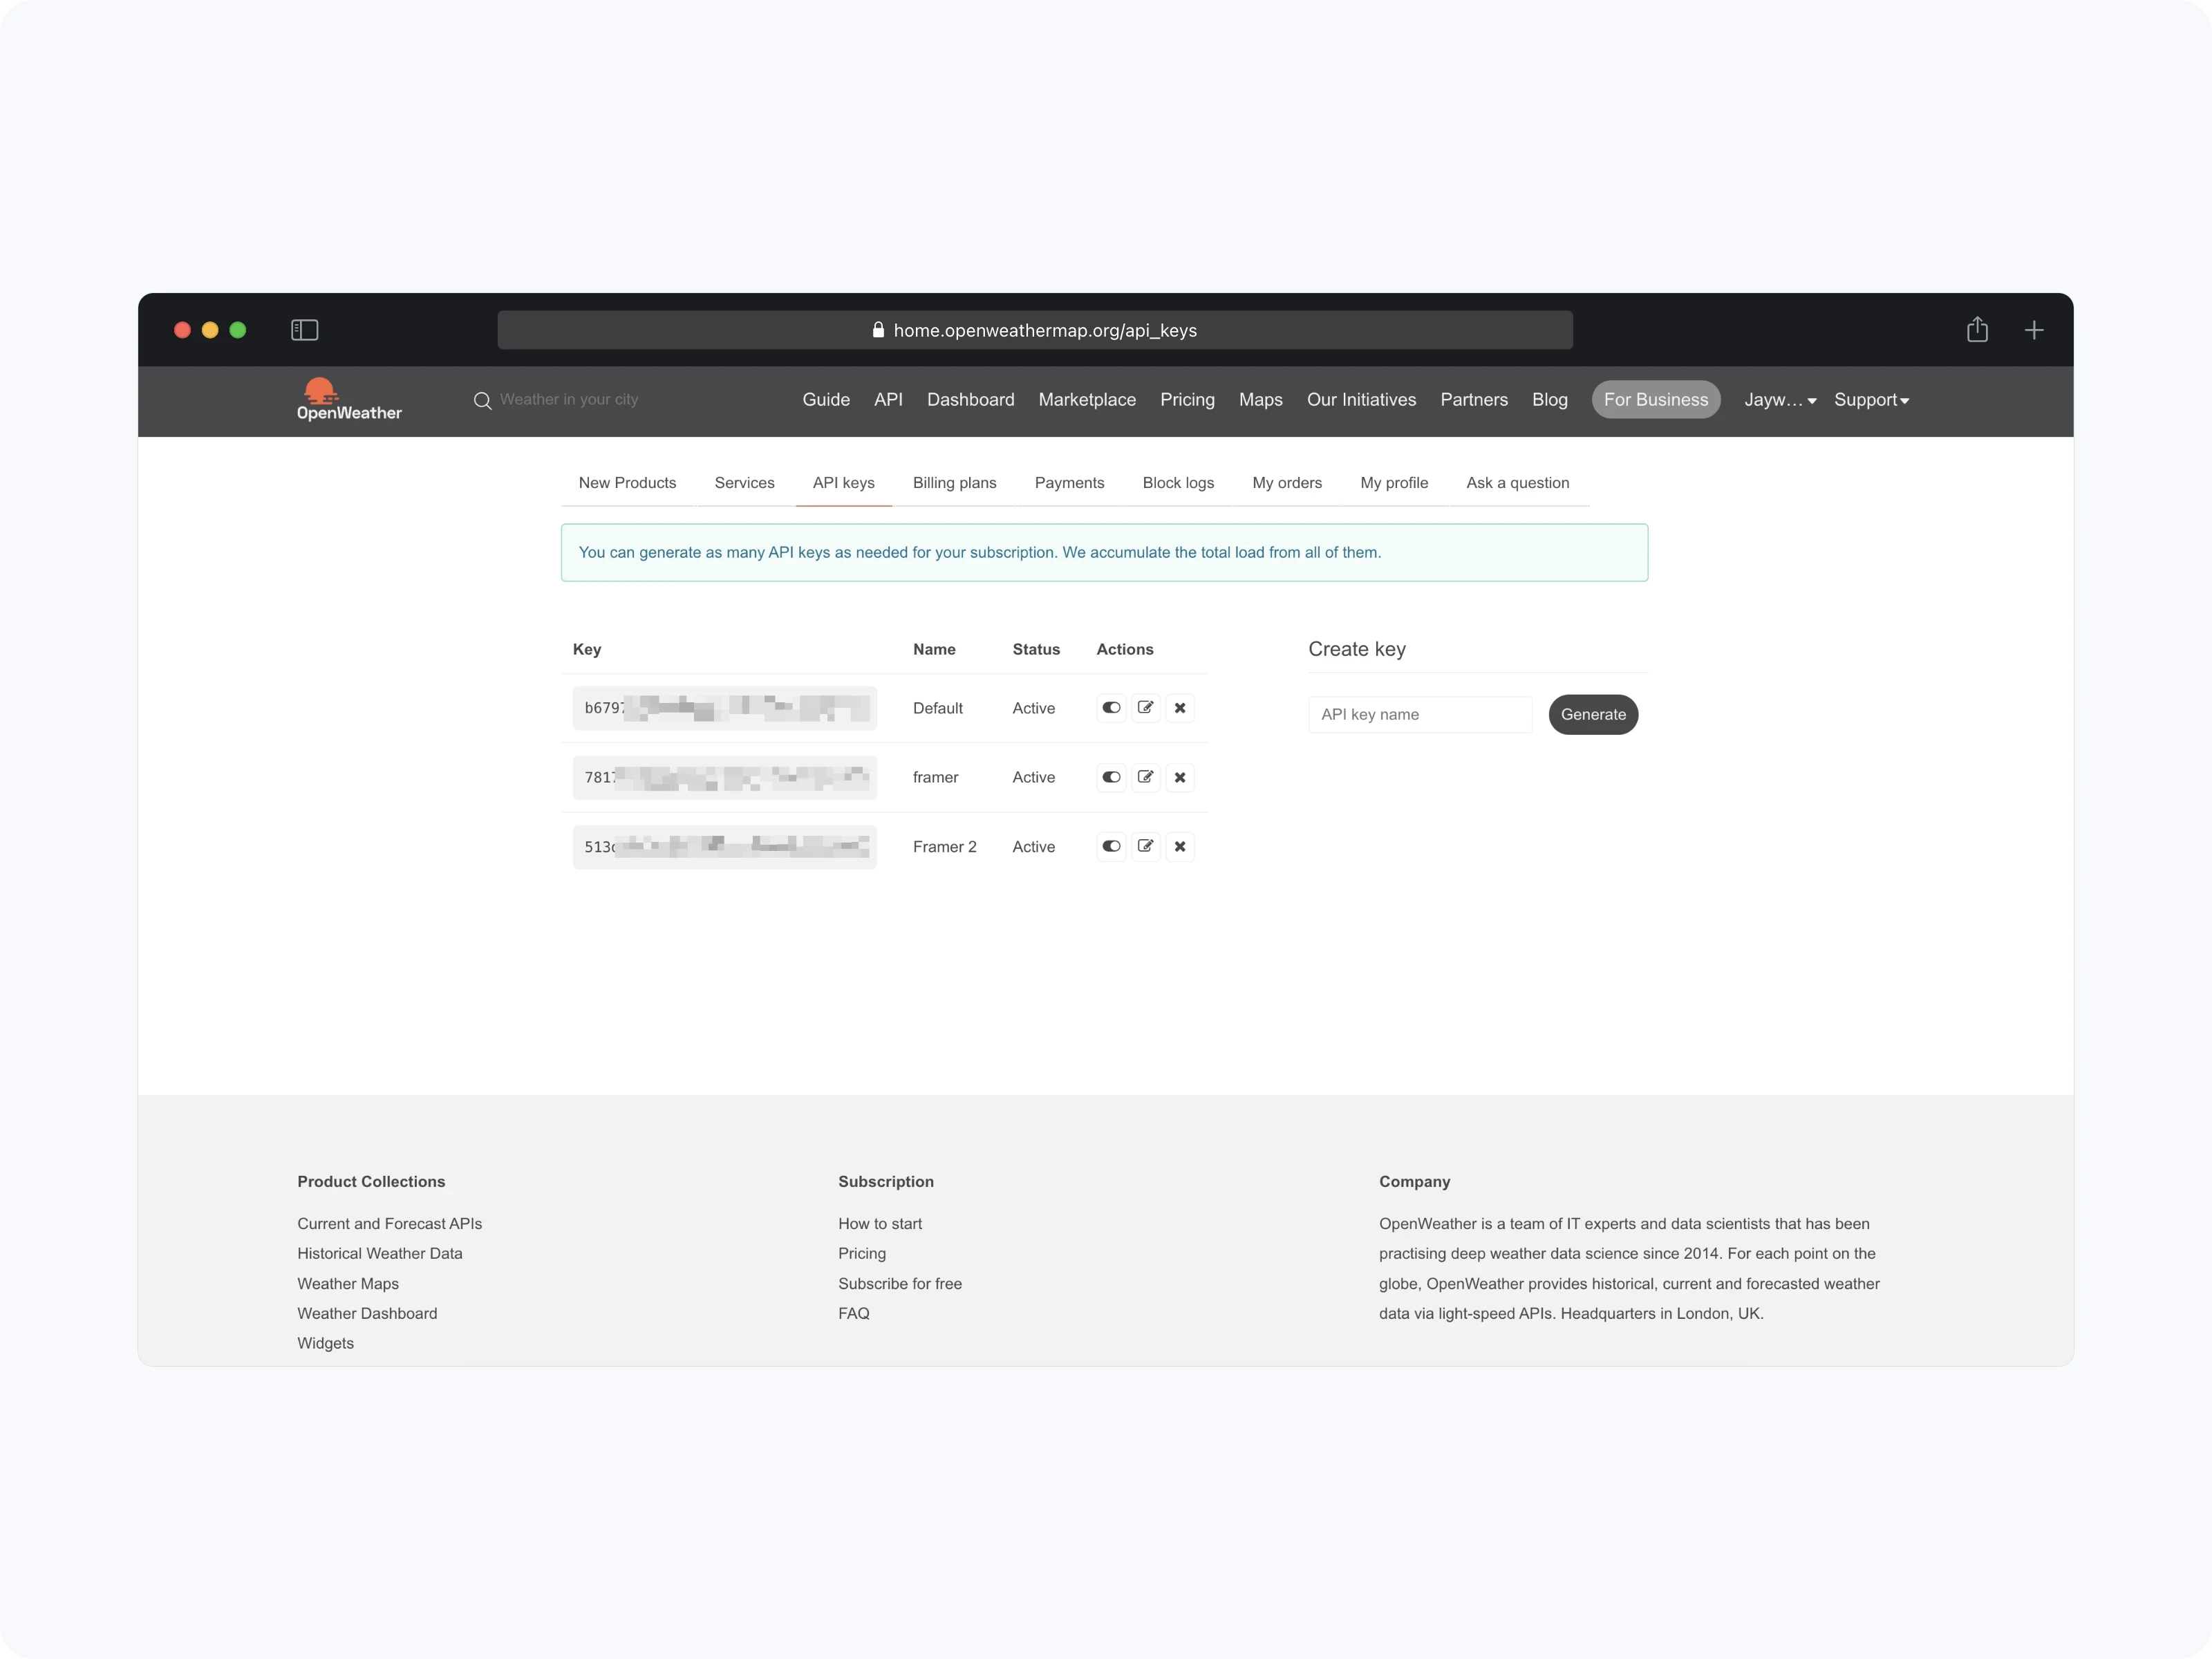
首先,我们需要注册一个[OpenWeather] 账户,然后前往[OpenWeather/My API keys] 即可看到 API Key。如果你没有看到 Key,可以在右侧生成新的 Key。
直接将 Key 粘贴到 “weather.setKey("Your Key Here”)” 中即可。
        React.useEffect(() => {
            weather.setKey("b679............")
            weather.setLanguage("en")
            weather.setUnits("metric")
            weather.setLocationByName("Shanghai")
            weather.getCurrent().then((data) => {
                setData(data.weather.main)
            })
        }, [])
最后,将 Override 与图层了连接即可。我们将 Override/Temperature 连接到温度文本,将 Override/Weather 连接到天气文本、标志以及背景。
预览组件,你可以看到所有的数据都开始变化,一个真实的天气小组件就完成了。
完整代码
import * as React from "react"
import OpenWeatherAPI from "openweather-api-node"
import type { ComponentType } from "react"
export function Temperature(Component): ComponentType {
    return (props) => {
        const weather = new OpenWeatherAPI()
        const [data, setData] = React.useState(0)
        React.useEffect(() => {
            weather.setKey("Your Key Here")
            weather.setLanguage("en")
            weather.setUnits("metric")
            weather.setLocationByName("Shanghai")
            weather.getCurrent().then((data) => {
                setData(data.weather.temp.cur)
            })
        }, [])
        return <Component {...props} text={data.toFixed(0)} />
    }
}
export function Weather(Component): ComponentType {
    return (props) => {
        const weather = new OpenWeatherAPI()
        const [data, setData] = React.useState("Loading")
        React.useEffect(() => {
            weather.setKey("Your Key Here")
            weather.setLanguage("en")
            weather.setUnits("metric")
            weather.setLocationByName("Shanghai")
            weather.getCurrent().then((data) => {
                setData(data.weather.main)
            })
        }, [])
        return <Component {...props} text={data} variant={data} />
    }
}
Content
@2025 THE STAGE FOR JAY JI.
- 0
- 1
- 2
- 3
- 4
- 5
- 6
- 7
- 8
- 9
- 0
- 1
- 2
- 3
- 4
- 5
- 6
- 7
- 8
- 9
@2025 THE STAGE FOR JAY JI.
- 0
- 1
- 2
- 3
- 4
- 5
- 6
- 7
- 8
- 9
- 0
- 1
- 2
- 3
- 4
- 5
- 6
- 7
- 8
- 9
@2025 THE STAGE FOR JAY JI.
- 0
- 1
- 2
- 3
- 4
- 5
- 6
- 7
- 8
- 9
- 0
- 1
- 2
- 3
- 4
- 5
- 6
- 7
- 8
- 9
@2025 THE STAGE FOR JAY JI.
- 0
- 1
- 2
- 3
- 4
- 5
- 6
- 7
- 8
- 9
- 0
- 1
- 2
- 3
- 4
- 5
- 6
- 7
- 8
- 9
@2025 THE STAGE FOR JAY JI.
- 0
- 1
- 2
- 3
- 4
- 5
- 6
- 7
- 8
- 9
- 0
- 1
- 2
- 3
- 4
- 5
- 6
- 7
- 8
- 9